ติดตั้ง VNC remote desktop บน Ubuntu
VNC คือ โปรแกรมสำหรับ remote desktop ระบบ linux ทำงานเหมือน remote desktop ของ windows
Step 1 Install Desktop Enviroment
sudo apt install xfce4 xfce4-goodies
Step 2 Install VNC Server
sudo apt -y install vnc4server
vncpasswd # ใส่ password ไม่เกิน 8 ตัว
vncserver :1
vncserver -kill :1
cp ~/.vnc/xstartup ~/.vnc/xstartup.bak
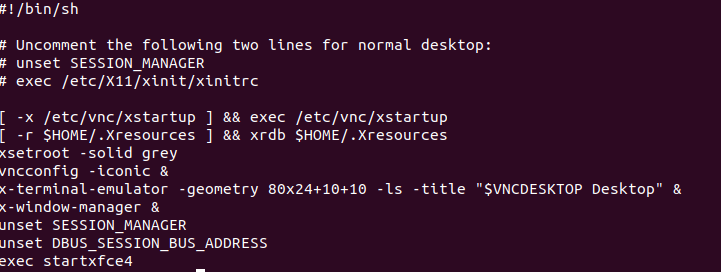
nano ~/.vnc/xstartup
เพิ่มเข้าไปในไฟล์ xstartup
unset SESSION_MANAGER
unset DBUS_SESSION_BUS_ADDRESS
exec startxfce4
chmod u+x ~/.vnc/xstartup
Step 3 ทำ Auto Start ให้ VNC Server
& sudo vim /etc/systemd/system/vncserver@.service ใส่ command ด้านล่าง
[Unit]
Description=Start TightVNC server at startup
After=syslog.target network.target
[Service]
Type=forking
User=ubuntu
Group=ubuntu
WorkingDirectory=/home/ubuntu
PIDFile=/home/ubuntu/.vnc/%H:%i.pid
ExecStartPre=-/usr/bin/vncserver -kill :%i > /dev/null 2>&1
ExecStart=/usr/bin/vncserver -depth 24 -geometry 1280x800 :%i
ExecStop=/usr/bin/vncserver -kill :%i
[Install]
WantedBy=multi-user.target
sudo systemctl daemon-reload
sudo systemctl enable vncserver@1.service
Step 4 สั่งรัน service VNC
vncserver -kill :1
sudo systemctl start vncserver@1
สามารถตรวจสอบว่าทำงานหรือไม่โดยเช็คจาก port
netstat -nltp

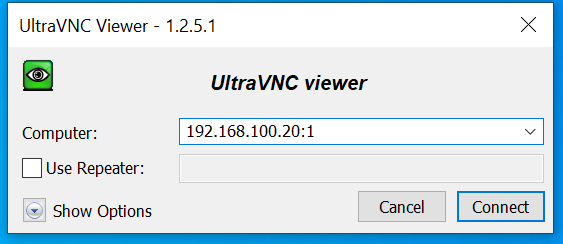
Step 5 ทดสอบ remote โดย
Windows download UltraVNC Viewer
https://www.uvnc.com/downloads/ultravnc.html
ใส่ IP เป็น your-ip address:1 1 คือ 5901
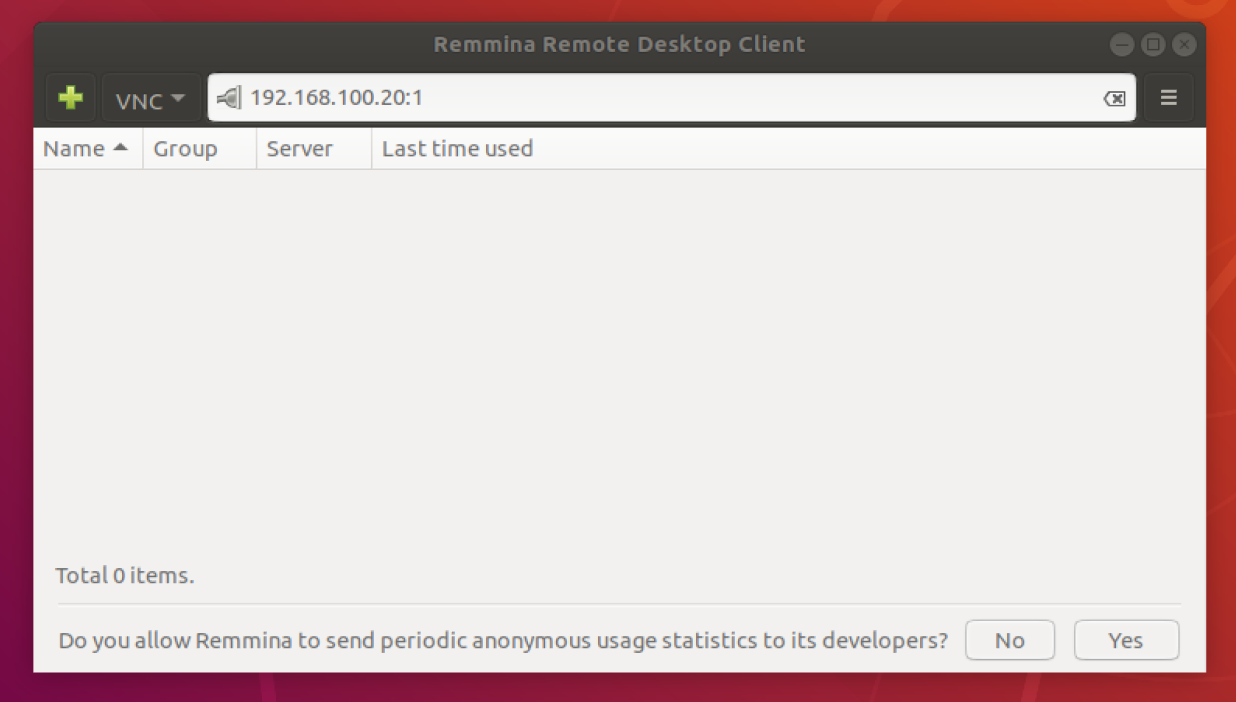
Linux
ใช้โปรแกรมชื่อว่า Remmina